Here are some steps to help you record 360° videos using your Insta360 camera and export these files for Avatour use
Video Tutorial:
Step 1: Download the Insta360 App
The first step is to download the "Insta360 - for ONE R, ONE X2, ONE X" app from your respective app store. You can download the Apple version here and the Google Play version here.
Step 2: Insert a microSD card into your Insta360 camera
Insert a microSD card into your Insta360 camera. For more compatible microSD card information, please click here.
If you purchased the turn-key Avatour kit, you should have received an Insta360 ONE X camera. The location to insert the microSD card is at the bottom of the camera, next to where you would screw the camera onto the Insta360 ONE X mount. See below for said location: 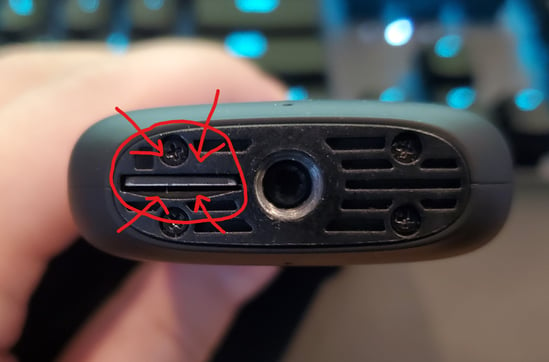
Step 3: Connect the Insta360 app to your camera
Before connecting your Insta360 app to your 360° camera, enable (i) WiFi, (ii) GPS, (iii) Bluetooth
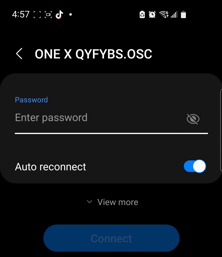
Next in your Android/IPhone "Settings" menu, please navigate to Wi-Fi and connect to the wireless network name that matches your camera model such as "ONE X ********" as shown in the graphic below.
Then return to the Insta360 application and click on the yellow camera icon at the bottom of the screen as seen below: 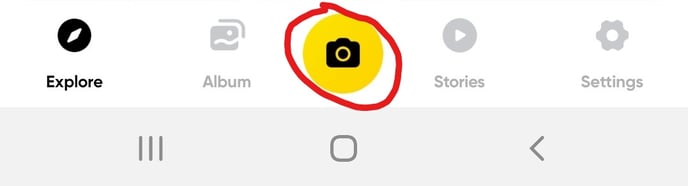
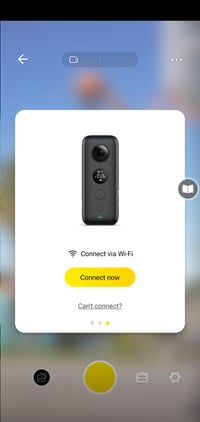
Then select what type of Insta360 camera you have and click yellow "Connect Now" button.
The same basic procedure applies for the One R or One X2 cameras, although the screen images on the app will be slightly different.
Tip: If running into difficulty with following the connection steps above, please refer to the Insta360 pages below for additional support: ONE X / ONE X2 / ONE R / ONE RS
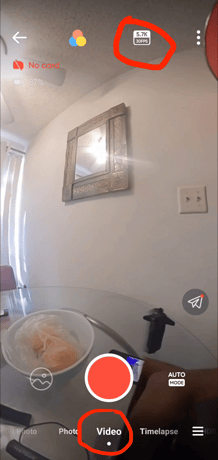
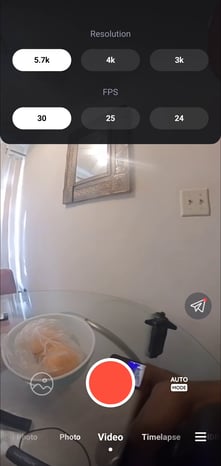
Step 4: Validating recording settings
Once you've connected to the camera, next you need to make sure that your settings are correct. For 360 recordings, this would need to be set to Video mode at 5.7k 30 as shown in the top right corner in the images below in the Insta360 application.
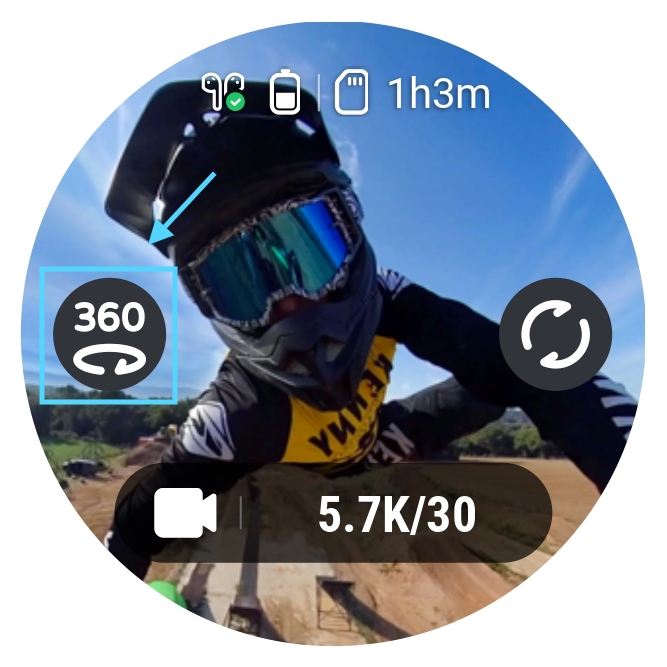
NOTE: Insta360 ONE X2 users will also need to verify that the 360 mode icon is present on the 360 camera screen before recording. To confirm this, tap the button in the center-left of the camera screen until the 360 icon is present as shown in the image below.
Once you have verified that your settings match the above images you are now ready to record your 360° video!
Step 5: Edit and Export your 360° video
After you are done recording your video, you can edit and then export your 360° video.
Mobile App:
The following is a very informative Youtube video that will teach you how to make some edits to your recording via the mobile application.
To export your video, do the following:
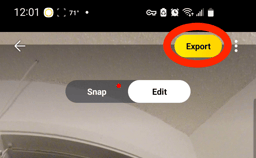
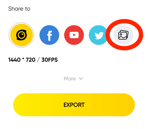
1) At the top of the screen, press the yellow Export button as circled in red to the right.
 2) Press verify the 360 option is selected to properly export this file.
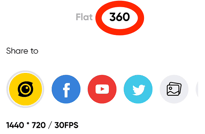
 3) Next, select the
 ![]() or
or ![]() icon to confirm this exported file will be saved in your mobile device's storage
icon to confirm this exported file will be saved in your mobile device's storage
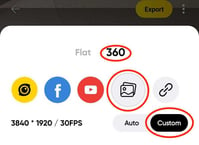
4) After selecting the phone gallery icon, you should see an option to select "Custom" as shown in the image. Please select this option to configure and confirm export settings such as resolution and bitrate.
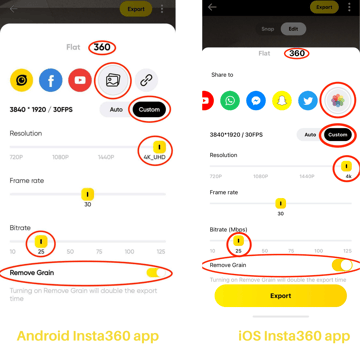 5) For the best results, we recommend exporting 360 content with a minimum of a
- 4K resolution
- Frame rate of 30
- a bitrate of 25 of higher
- And lastly selecting "Remove Grain" as highlighted in the images
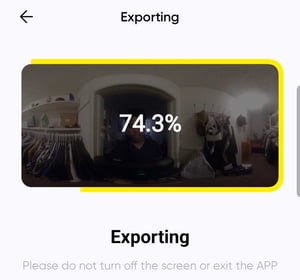
6) Lastly, allow your video to export. This can take a while depending on how large your exported video is.
To edit and export via Desktop/PC, please visit the Insta360 Studio tutorial page for steps on downloading and using this software.
Step 6: Upload to Avatour asset library
Android
Login to the Avatour app using your Host credentials, and navigate to the Assets tab.
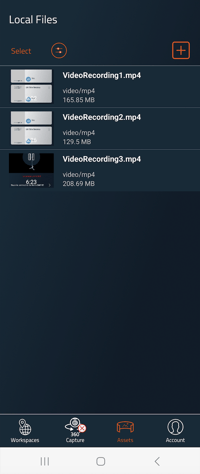
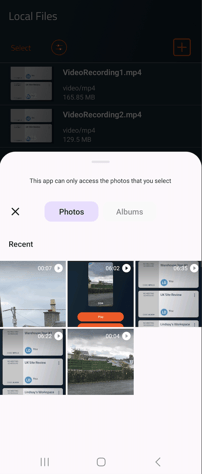
If you allow the app to access your phone's files, all of your images and videos saved on your phone's local storage will be displayed here. By clicking the "plus" icon in the top right of this screen, you can select specific files from your phone to be available for upload to Avatour.
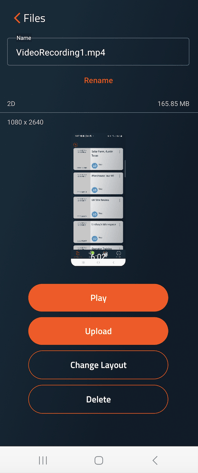
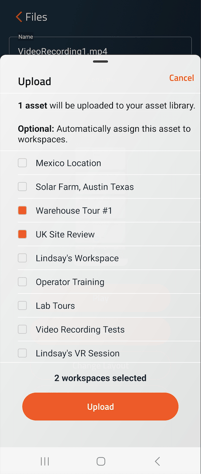
To upload a file to Avatour, select a file and tap Upload. Next, you can choose which Workspace you want to add this asset to. If no Workspace is selected, the file will be stored in your My Assets library.
iOS
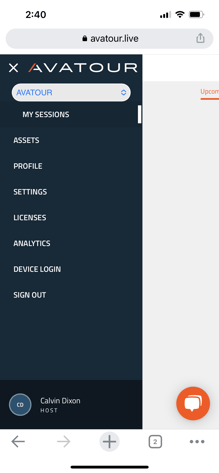
Using your iOS mobile browser, login into the Host Dashboard at avatour.live/login
Next, click the top left pane option and select "Assets".
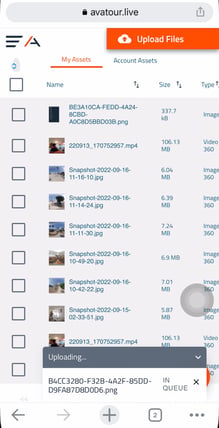
Once this page has loaded select the orange "Upload Files" button in the top right corner to access your phone's media library containing the exported files

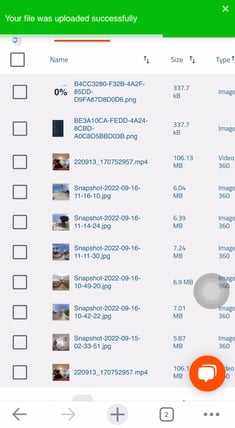
After selecting which files to upload, progress will be indicated in the bottom right corner of the page. A green completion banner will appear at the top of the browser page once the upload is finished.